
Project Brief
For this studio assignment we were required to develop a toy or a game, based on research of a specific user;
Choose a specific category of toys or games you are personally very interested in and enjoy. Select a specific user, observe, document.
As an adult collector of high-end figures myself, I couldn’t wait to get started. I had many ideas and delusions of grandeur, but considering the limited time and budget, I had to scale back the scope of the ideas – at the very least I wanted a highly finished & articulated figure to present for final submission.
I had 3 initial concepts; action figures based off chess pieces, robotic-monster alphabet letters & alphabet spaceships for action figures:


After a brief in-class presentation and discussion of the above concepts, I decided to pursue the action figure concept. I then conducted some research into user, market matrix study and what I wanted to achieve in my figure; Articulation, Poseability & Finish.


The guidelines and brief I set up for myself where to target the adult collector, interested in high-end figures & screen accuracy (for an imaginary movie/TV show tie-in). The figure itself had to be highly poseable and able to pull off some dynamic poses.
Concept
Settling on the Chess motif, I had the idea that the movement and attack pattern of any chess-piece – as well as the piece’s historical development, would be the guiding design factor.
If one thinks of this as the chassis of my idea, giant-alien-mecha would be the body panels!!
I chose to start with the Queen piece as (in my opinion) it is one of the coolest pieces to play with in the game, as it’s range is far and movement omnidirectional.


I tried to keep the design language neat and elegant, peppered with concentrated areas of detail, the Japanese call this aesthetic Shibui.
Another reason for the ‘elegance’ & ‘simplicity’ was to emulate and echo traditional chess-pieces; although they’re simple – their shapes are iconic. I wanted to keep that!!
As the designs progressed – my initial idea for a gimmick was to include a separate, smaller & simplified sculpt of the figure as a chess-piece, to use in an actual chess game if one were to buy all of the figures.
This gimmick suddenly changed to incorporating the chess-piece into the figure itself, as the torso piece;
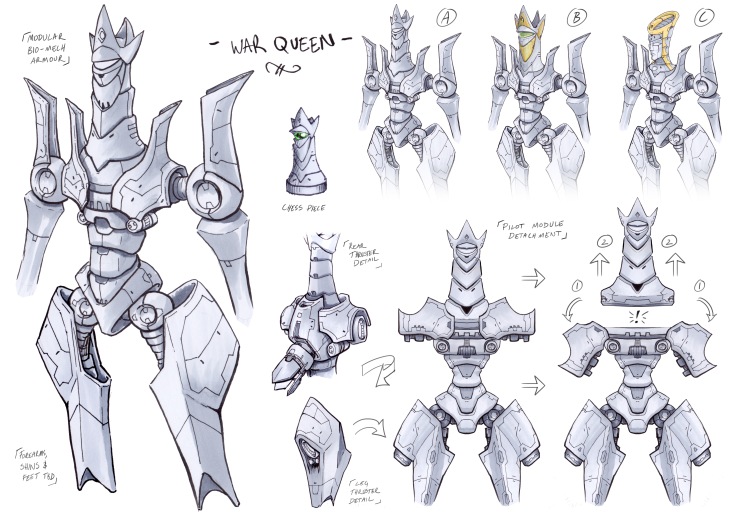
This ‘body-part that attaches to activate’ is another old trope common in Japanese anime/mecha shows;


I continued with this idea – thinking another cool gimmick could be the swapping of torso pieces to create your own mech, mixing their weapon configurations too for a wide range of customizing possibilities.
I set about designing the Knight (second favourite piece), again the piece’s movement, attack and history influenced the design;


I knew given the time available, I wouldn’t be able to make a second figure, but I could make a few chess-pieces to demonstrate the torso-swapping gimmick.
After several design iterations, I decided to pursue a streamlined, mono-eyed design, and move away from a typical horse.
Design & Sculpt
Knowing I wanted to have a wide range of movement and dynamic posing, I pillaged my own box of spare parts and my son’s Lego Bionicles.
In my bits-box, I had a number of joints for customizing and scratch-building that I had bought from Japan a decade ago – and having helped my son build Lego action-figures, I knew the robustness and range of movement from the Bionicle range would be exactly what I’d need.
I set about scanning some of the pieces and measuring them with my trusty vernier caliper to replicated them exactly in my 3D program so I could then build around and incorporate them into my design;


As I had always planned to 3D print the components of my toy, I figured I might as well sculpt in the negative space for these joints too, so I could incorporate them into my design with minimal fuss.
Using my later concepts as a guide, I went ahead and started sculpting my figure with a 1.5mm to 2mm wall thickness to provide strength and also make sure it prints well!


I found reference art for the female body, as I thought it was important to at least get the broad strokes of the female physique correct. The screen-shots above show the progress of the sculpt with the stand-ins for the joints coloured in black.


This was the final sculpt before arranging all the pieces in several batches to be sent to the 3D printer. The lower left image shows the torso-swap gimmick and the lower right image shows the final Queen, Knight & Rook sculpts.
Part way through the assignment, our lecturer Carlos Montaña Hoyos advised that our toys and game concepts would be displayed in a symposium to be held in the week of final submission – we would need to provide artwork as promotional images for the event and as a backdrop to our displays.
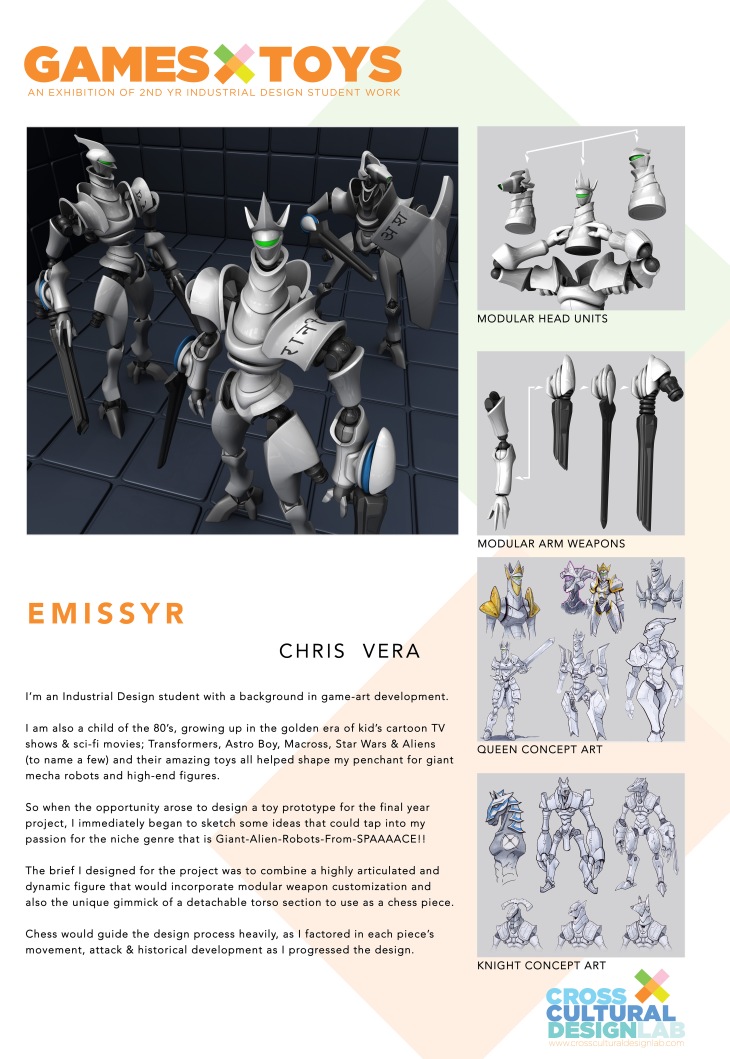
Using the final sculpt model, I rendered off a hero shot and additional images that show the intended gimmicks;


Note: the Sanskrit symbols on each figure are the names of their respective chess-pieces in the Indian precursor to Chess, Chaturanga. From left to right; Rook – Ratha रथ, Queen – Rani रानी & Knight – Aśvaḥ अश्व.
Again, using the final sculpt models – I uploaded them individually onto SketchFab, to be able to inspect the models in 3D space. As they were modelled using the Sub-D technique, my low-poly model has been smoothed out with increased tessellation for the upload to make the polygon surface match the Sub-D smoothed surface. The downside is the file size and may load slowly on some computers/browsers;
[SketchFab > Queen] [SketchFab > Knight] [SketchFab > Rook]


Prototype
The type of 3D printing I used was Fused Deposition Modelling (FDM), aka Fused Filament Forming (FFF) on a Cocoon Create (Wanhao i3 Duplicator) printer from Aldi. The material used was PLA plastic.
Once the first 3D print batch (one of 5) was received, I immediately washed in soapy water and coated in grey primer-filler spray paint. This helped me see where I’d need to sand and get rid of the print lines. Each piece had at least 3 coats of filler-primer with sanded surfaces inbetween each coat to get a decent (not perfect) surface.


I carefully peeled off the individual pieces off the base layer and carefully cut, filed, drilled and hacked away at the support structure – which was a massive pain and very time-consuming. So time-consuming in fact, I had real fears the toy would not be finished in time or worse – not up to the standard I wanted it to be.
As I finished each component, I excitedly test-fitted and adjusted the pieces as needed.


I spent 4 full days preparing the pieces, cutting, drilling, sanding, fitting, testing, gluing & painting – all in tandem as other 3D prints came rolling in.


I embedded rare-earth magnets in each forearm, torso and at the base of each of the chess-pieces to facilitate the gimmicks I had in mind. Unfortunately for me, the magnets in each forearm dislodged or became unstuck from the glue, which meant that the modular weapons would no longer sit where they were meant to.
Final Submission & Symposium
For the poster we were required to make, I had to come up with a name for my toy. This had been hard to nail down!! I had so many ideas…
Eventually, I decided to combine the word ‘Emissary‘ with the suffix of ‘Syr‘ to sound vaguely exotic, pseudo-Sumerian maybe? I’m not sure, but I liked the sound of it. It gives the impression that these robots are old, ancient and the harbinger of something else, something unknown.
I had plans for a ‘pitch document’, as if I’d be pitching this kids show & toy line to a TV executive. Unfortunately due to the time constraints and underestimating how long it’d take to finish the model, I didn’t get to craft such a document.
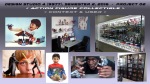
On November 10th, the “Games x Toys” exhibition (as part of the “Play, Creativity and Culture Symposium” for the Design Canberra Festival) opened to the public;
To the few people I talked while briefly at the exhibition, I received a positive response for my idea and concept.
The torso swapping and chess-piece gimmick was a big success.
The modular weapons were not, in my eyes – a success. The magnets to hold them in place didn’t work as I had predicted and cause them to sag on the underside of the arm.
Not a huge deal, but not what I had planned.


In regards to the final sculpt, finish and build – I was happy with the final result.
It could hold almost any pose well and could be positioned dynamically with minimal fuss.
Reflection & Final Thoughts


I feel very happy with the final prototype, given the time allowed. Everything but the arm/weapon magnets work as designed and intended and the aesthetics tick all the right boxes for me – however with more time I’d have sculpted more surface detail and I would have *loved* to have been able to make a second body type (Knight) to compliment the current sculpt.


Additionally, I would have also loved to have fully painted the prototype, with exotic alien-livery, battle damage, paint scuffs, etc.
Although challenging, I found the whole process fun and the final prototype – satisfying.

![[ Full-size of above image ]](https://chrisvera101.files.wordpress.com/2016/11/concepts_queen_03.jpg)
![[ Full-size of above image ]](https://chrisvera101.files.wordpress.com/2016/11/vera_pdf.jpg)
coool !
LikeLike